With AutoSoftWay, there are two methods to create an invoice:
- Create an invoice from scratch
- Create an invoice from an existing order
In this guide, we will explore both of these options in detail.
Method 1: Creating an invoice from scratch
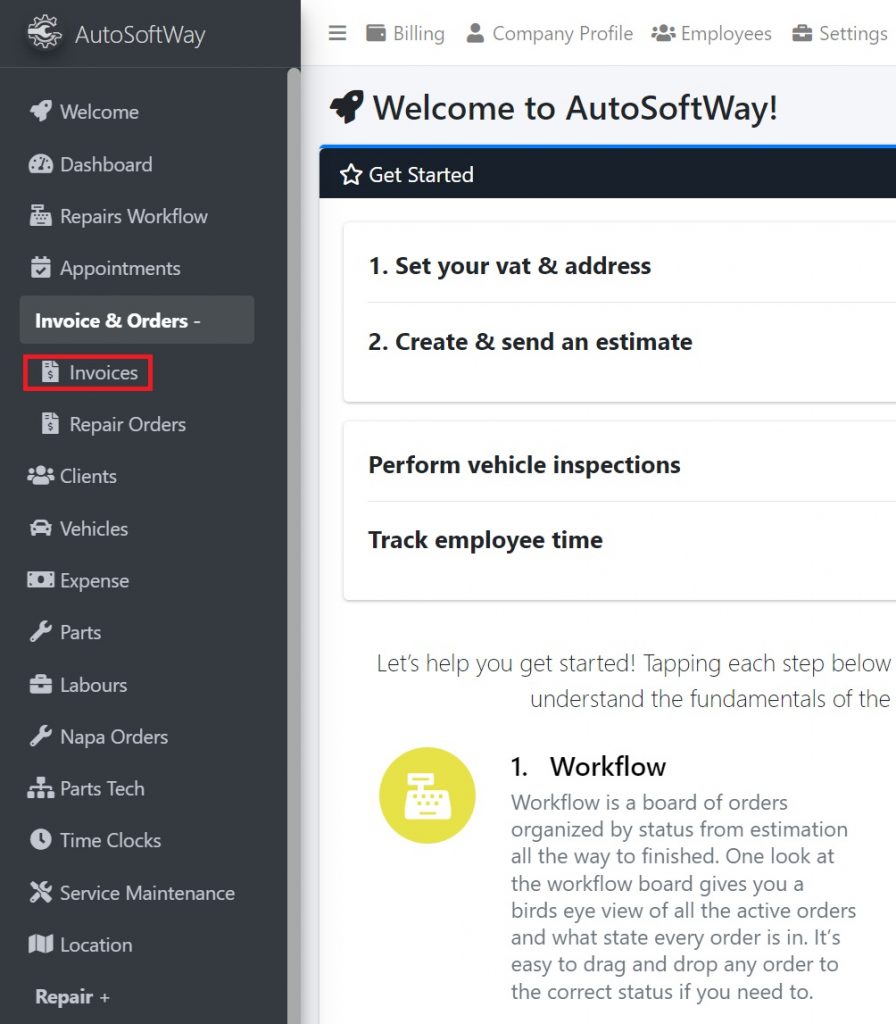
Step 1
Starting from the Welcome page, navigate to sidebar menu, and click on the ‘Invoices’ tab under the ‘Invoice & Repair Orders’ section.
Step 2
From the ‘Repair Workflow’ menu, click on ‘Invoice’ and then click on ‘Add’.


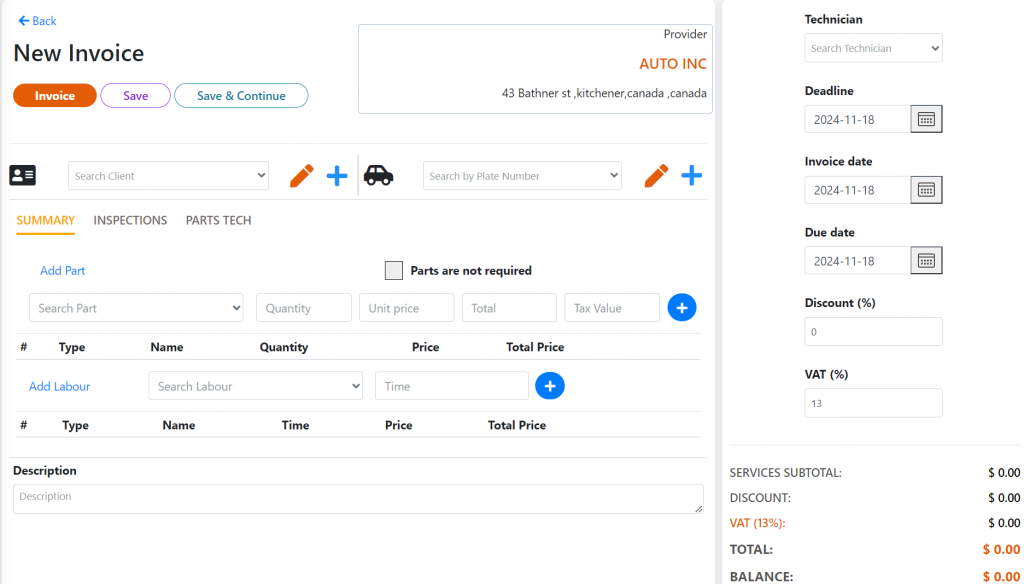
Step 3
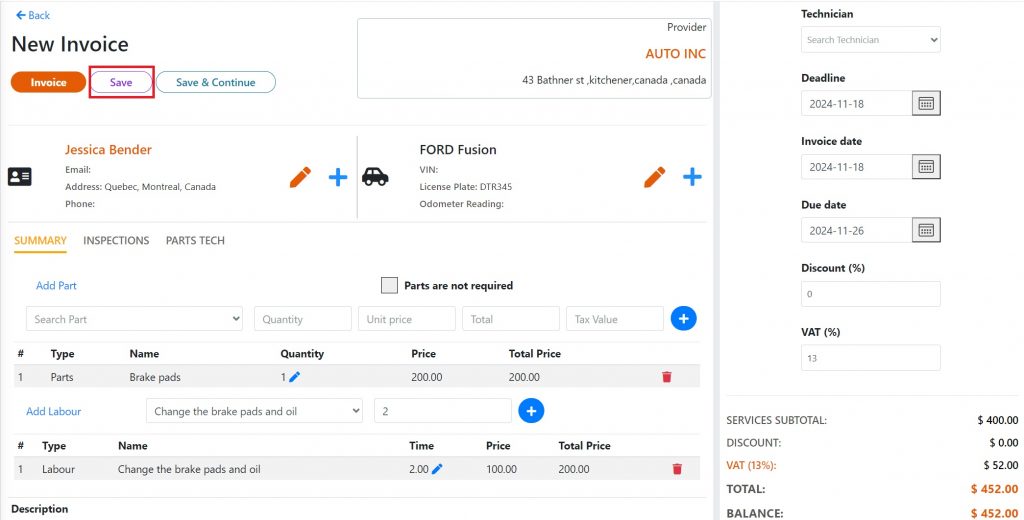
A new Invoice window will open with all fields displayed as blank, ready for input.
Step 4
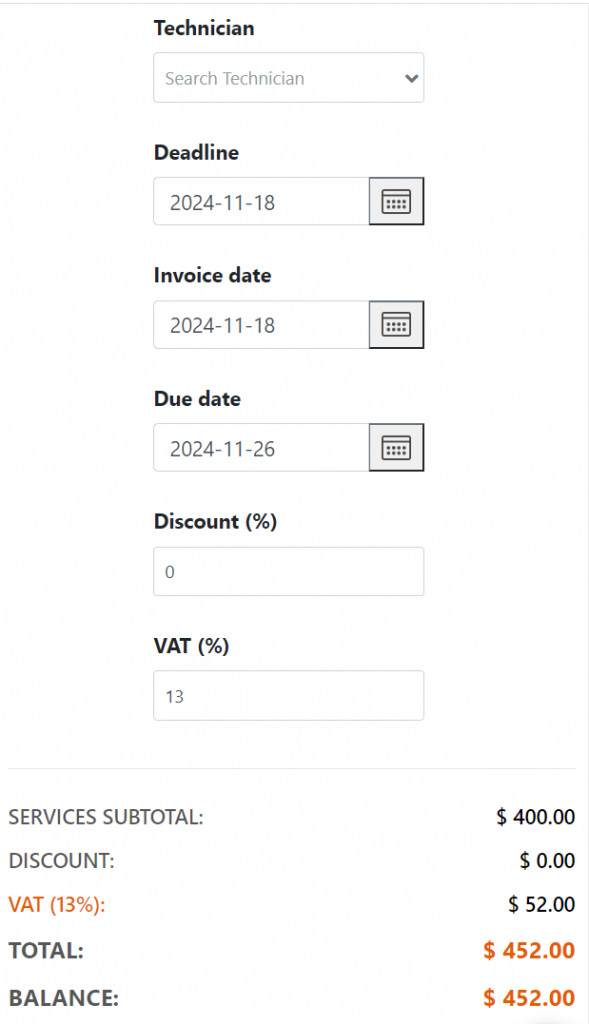
Make sure the information is input correctly. If the information already exists in your system, AutoSoftWay will auto populate the all information!
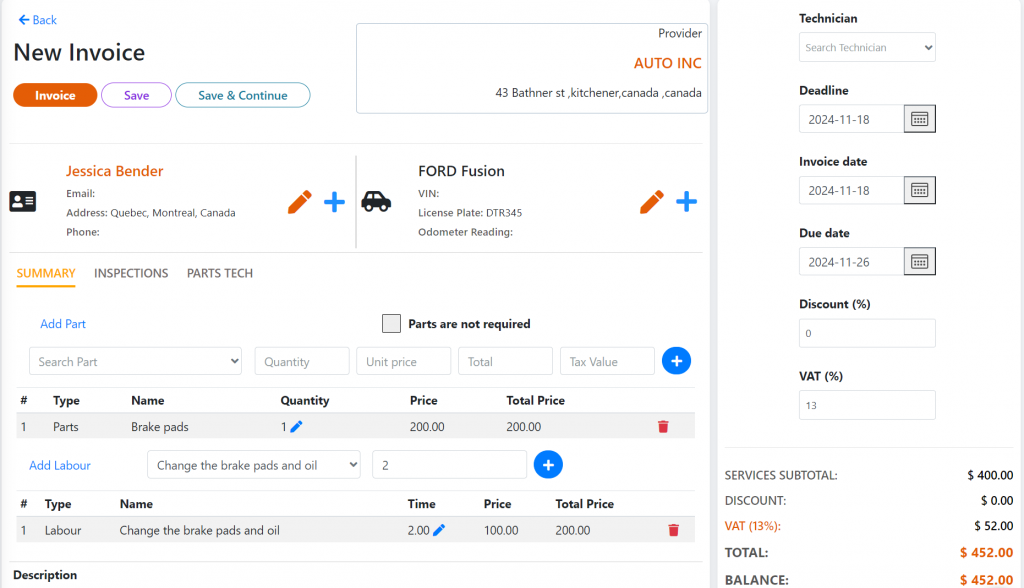
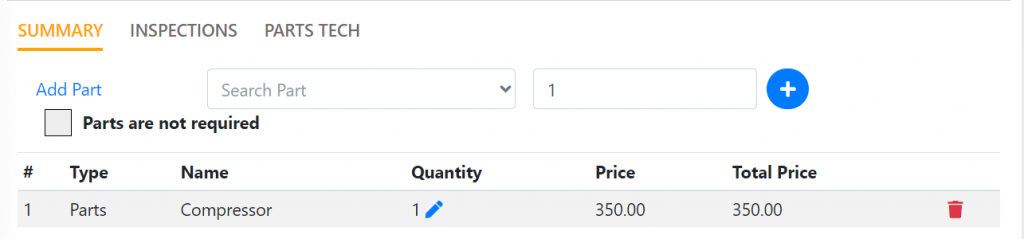
If the job requires multiple parts, click on ‘Search Part’ and then press the ‘+’ sign once the part is ready to be added.
If the job requires multiple labours, click on ‘Search Labour’ and then press the ‘+’ sign once the labour is ready to be added.

The total costs for parts and labour are displayed below, and taxes are calculated automatically.
Once all the fields are completed, press ‘Save’ located on top of the page.
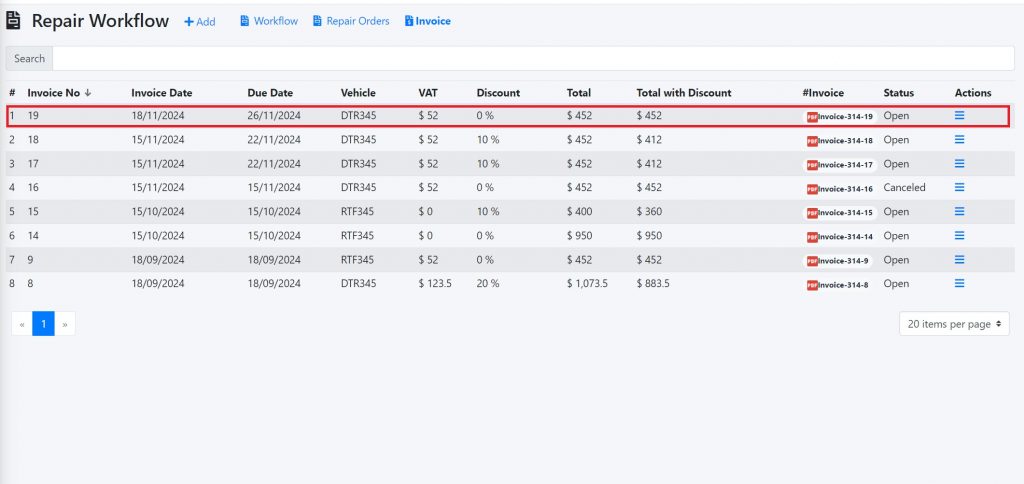
Step 5
The Repair Workflow now displays all completed invoices, with the most recent ones appearing at the top. Once completed, each invoice is securely stored in the system.